
DSLR Camera sling
- Anna Young

- Feb 26, 2018
- 3 min read
I enjoy photography and have an older Cannon 40D so when I was asked to make a camera sling I jumped at the chance.
I decided to use a dyed through veg tanned shoulder.
There are a few challenges making a sling strong enough to hold the weight of the camera and a large lens.

I copied and modified an existing sling to work in leather creating a template and a test piece in leather.
I chose a thinner leather for this project as I don’t want any unfinished edges to show so all pieces are finished leather on both sides. I will explain this better as we progress.

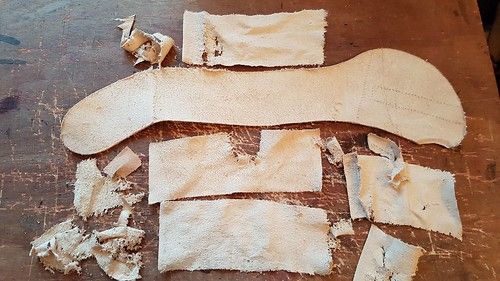
These are the leather pieces there is also some foam padding this is a challenge as this will be an all weather sling which may get wet. I asked a friend at Le Prevo the leather supplier (thanks Pete) who suggested an exercise mat which could be cut to the desired size and shape before being encased in leather.

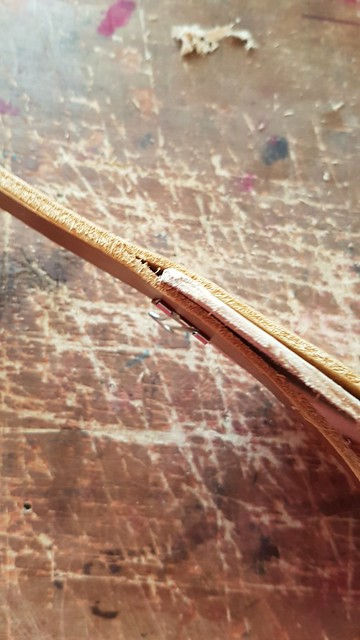
In order to fix the straps in place without having them stitched to the outside of the shoulder section I decided to use the original piece of leather inside the shoulder piece to make this possible I thinned down the centre section which is also where the foam will be attached.
I used my bench top skiver to remove the centre section I have left the outer ends full thickness where the straps will be attached. this will then be glued and stitched into the middle of the outer covers making a super strong joint.

The piece of uncoloured veg tanned leather you can see the straps being attached to is the central core of this strap. Once everything has been glued and stitched to this core I will add the padding and the front and back covers. This will reduce the amount of stitching visible without loosing any of the strength.
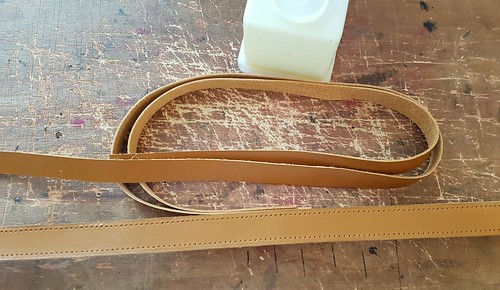
Starting to make the short under arm strap there is no unfinished leather on this strap so each piece is made from two pieces of leather the main strap is two pieces of full thickness leather where the short strap is split in half so the finished piece is the same thickness as the original leather.
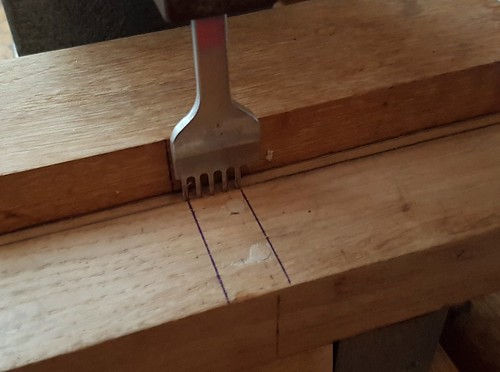
Every single stitch on this strap will be done by hand and therefore requires a hole, normally this is a multi stage system dividers are used to mark a line a pricking iron is used to mark the hole with a hammer then an awl is used to open the hole to allow the needles to pass. I have recently purchased a hand arbour press which I have had adapted to take my pricking irons. With the addition of a fence I no longer need to mark the lines or hit the punch with a hammer. I think this will save me the best part of a day marking and punching holes I also suspect that as the press has 1 ton of pressure the awl may not be needed either.

Here are the components for the short strap Sam Browne studs and small straps to hold them in place.
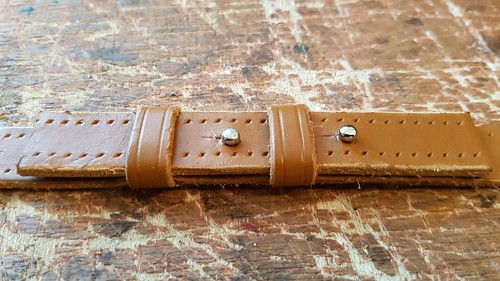
This is a test piece for the studs and holes.

Almost finished I have painted the edges the right end of the lower part of this strap has been thinned right down to allow it to be attached to the centre core.
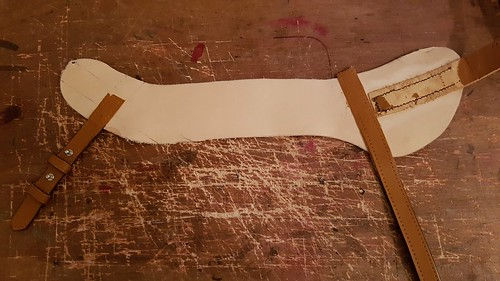
Here you can see the centre core with the first three straps attached on the right side of the picture is the main strap which has had the finish removed to allow the upper piece to be glued to it.
Each strap is actually two pieces of leather which are currently glued together but will be hand stitched. One piece of the strap passes on each side of the centre core.

Hand stitching the straps took some time but I got there eventually.
The next step was to add the padding to the underside I chamfered the edges of the foam before sticking the centre piece to the top panel here you can see the bottom panel ready to be glued in place.

After stitching the inside looks like this.

The outside looks like this


Ready for delivery.
Thanks for reading


Comments