
Custom pen trays
- Anna Young

- Jan 19, 2020
- 4 min read
I rubbed down the paint I have been commissioned to make some custom pen trays for a dealer who travels to many pen shows in the UK and Internationally.
The key issues were to make a strong tray that would be able to stack into hand luggage and also look attractive when displaying pens at shows.
My initial thoughts were to make a solid pieces of wood by laminating two pieces of plywood to give sufficient depth to allow me to use a router to cut slots to make the mould.

Unfortunately because of the way plywood is made and the requirement for a very small piece between slots these were 3mm and they snapped off ideally I wanted 1.5 mm to 2 mm. MDF did not work either.
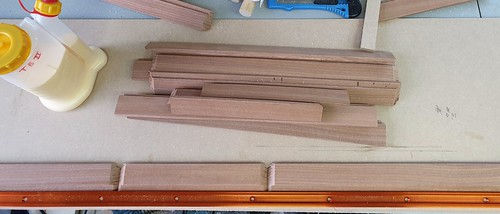
I decided to go back to my previous method using moulding to make the slots getting the extra height for the sides would be a challenge.

Using my bandsaw with a fence set to remove 2 mm from the edge which is to join I cut all 26 pieces.
I frequently use artists gray board it is compressed board and behaves just like wood.

I made a jig to help me to glue the board to the moulding.

Standing to attention at this point the slots were too wide about 28 mm and I wanted 22mm I tried using my bandsaw but eventually reverted to a micro hand plane which took a lot longer but I am happy with the finished result.

Now that I have something I am happy with I need to add the end pieces and glue it all together.

All of that work was to get this result 13 pen slots of equal width and depth I need 6 of these for this project so I have 5 more to make.
Now that I am happy with the moulding for the inside I can look at the outside this is my plan.

This is what that looks like in wood. Just upside down.

After cutting the rebates I sanded the whole length of wood and removed the sharp edges. Before cutting them into the required lengths.

After cutting the pieces to size I mitred the ends ready for assembly I am working on a system to help with this.
Actually I never got around to working out a system I just applied tape over the outside of each joint and added some glue.

Here is a trial fit of the insert although it fits it needs to be trimmed to size.

I know it looks like it fits fine but when I add the lining strips to the inner edges of the tray and wrap the insert it will not fit. Once I have made the lining strips I will be able to make the adjustments to the size of the insert.

This is a trial fit before the wax is applied to the outer wood I am going to fix this in place with 3m double sided tape, this is the industrial stuff.

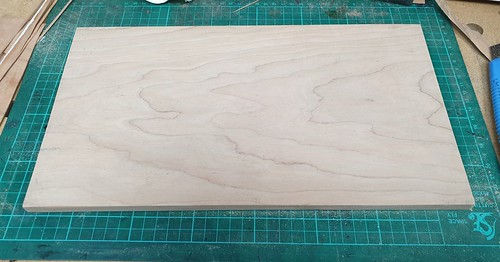
I have also made 2 lids the top is 6mm MDF and the inside is 3 mm MDF with Sapele edging.

I have started spraying the lids with black lacquer which if I have done it right will give a smooth finish, If it does not work I will need a plan “B” which maybe some sort of veneer but hopefully the paint will be good.


As soon as I started spraying yesterday afternoon the temperature dropped like a stone. It was only 2 degrees this afternoon so I painted them and put them back in the workshop and turned the new heater up.
I also started applying the dark wax to the wooden trays and polishing them.


The dark wax really brings out the tones in the wood.
The drop in temperature wrecked the paint so I had to come up with plan “B” which in my case is veneer and I have a large box of veneer in my garage.

I rubbed down the paint and applied some glue.

There are many ways to apply veneer vacuum press, clamps my favourite is heat lots of heat. Apply glue add veneer then apply pressure from a hot iron. The idea is to well we wont go into that. but after 20 mins we have veneer.
I should have done this in the first place I am much happier with this result as ever the second one went wrong. But I was able to remove the split veneer while it was still hot so I can start again tomorrow with the spare sheet of veneer.

After veneering the tops I decided to add some wood stain to darken it a little before waxing it.

Six trays needed 12 pieces of edging so I fitted them.
Once the edging was fitted I could mark the size of the inserts and trim them to size.

It is time to wrap the inserts in the synthetic suede.
The process is quite simple I glue one edge then apply glue and press the material into the slots using a dowel.

I work my way along the insert until all of the slots are filled.

The underside is folded under and glued in place.

Six trays is a lot of work and took way longer than I expected
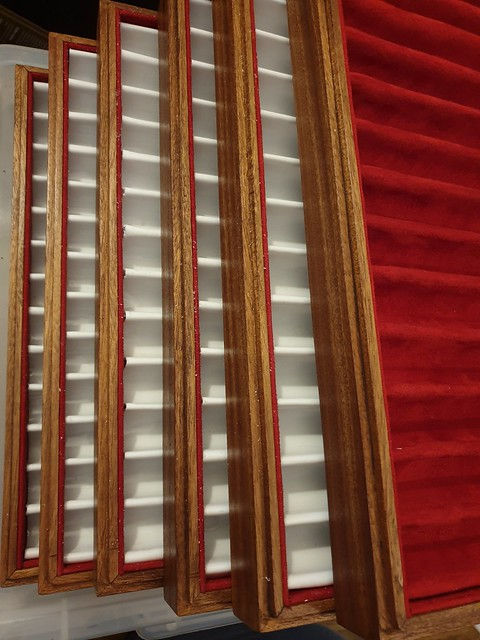
Eventually all six trays were completed.


I lined the inside of the lid with leather paper so it could be used for a writing pad when at pen shows.

Finished.


Comments